|
|
Finding himself with time on his hands (wonder what that feels like!?!), Maris Dislers translated it into English. His edited translation is published here with the full permission of both Kai and LINA Editor Ingemar Larsson. Thanks, guys! Given the fact that a lot of us die-hard motor-heads are now using older engines from the “classic” era in our ongoing attempts to relive our younger days (guilty as charged, m’lud!!), I thought that the periodic need to replace piston rings in a motor for which spares are no longer available might make this article quite relevant for many people. Although Kai made his rings of leaded steel, I’ve used basically the same technique to make cast iron rings on a number of occasions. Kai is quite correct when he says that anyone who can do simple turning work on a lathe can make excellent rings! Anyway, here it is, with sincere thanks to Maris for the translation.I have edited the article myself a little to add some clarity to certain passages. Adrian C. Duncan January 2015 Making Piston Rings By Kai Karma Let’s suppose that you have an older engine for which you cannot buy new piston rings. Or perhaps you just want to experiment and learn something new. Either way, if you can turn metal in a lathe, you can make new piston rings. I describe here how I made new rings for my Supertigre 51 motors. The rings worked very well - I used them to compete and practice in F2B throughout the summer of 2007, also competing in the Finnish championship as well as at the contests in Aalborg (Denmark) and Vänersborg (Sweden).
I assume that you have the old worn rings to use as a pattern. You begin by turning a plain round ring. Its inner diameter should be the same as the original ring when not compressed in the cylinder – in other words, when the ring gap is open. The outer diameter should be 0.4 - 0.5 mm (0.016 – 0.020 in.) greater than that of the originals, while the thickness of the new ring should be the same or a maximum of 0.02 mm (0.0008 in.) greater. If you are reasonably competent at lathe work and your tools are sharp, these limits are not particularly difficult to achieve. Figure 1 shows what you are trying to accomplish.
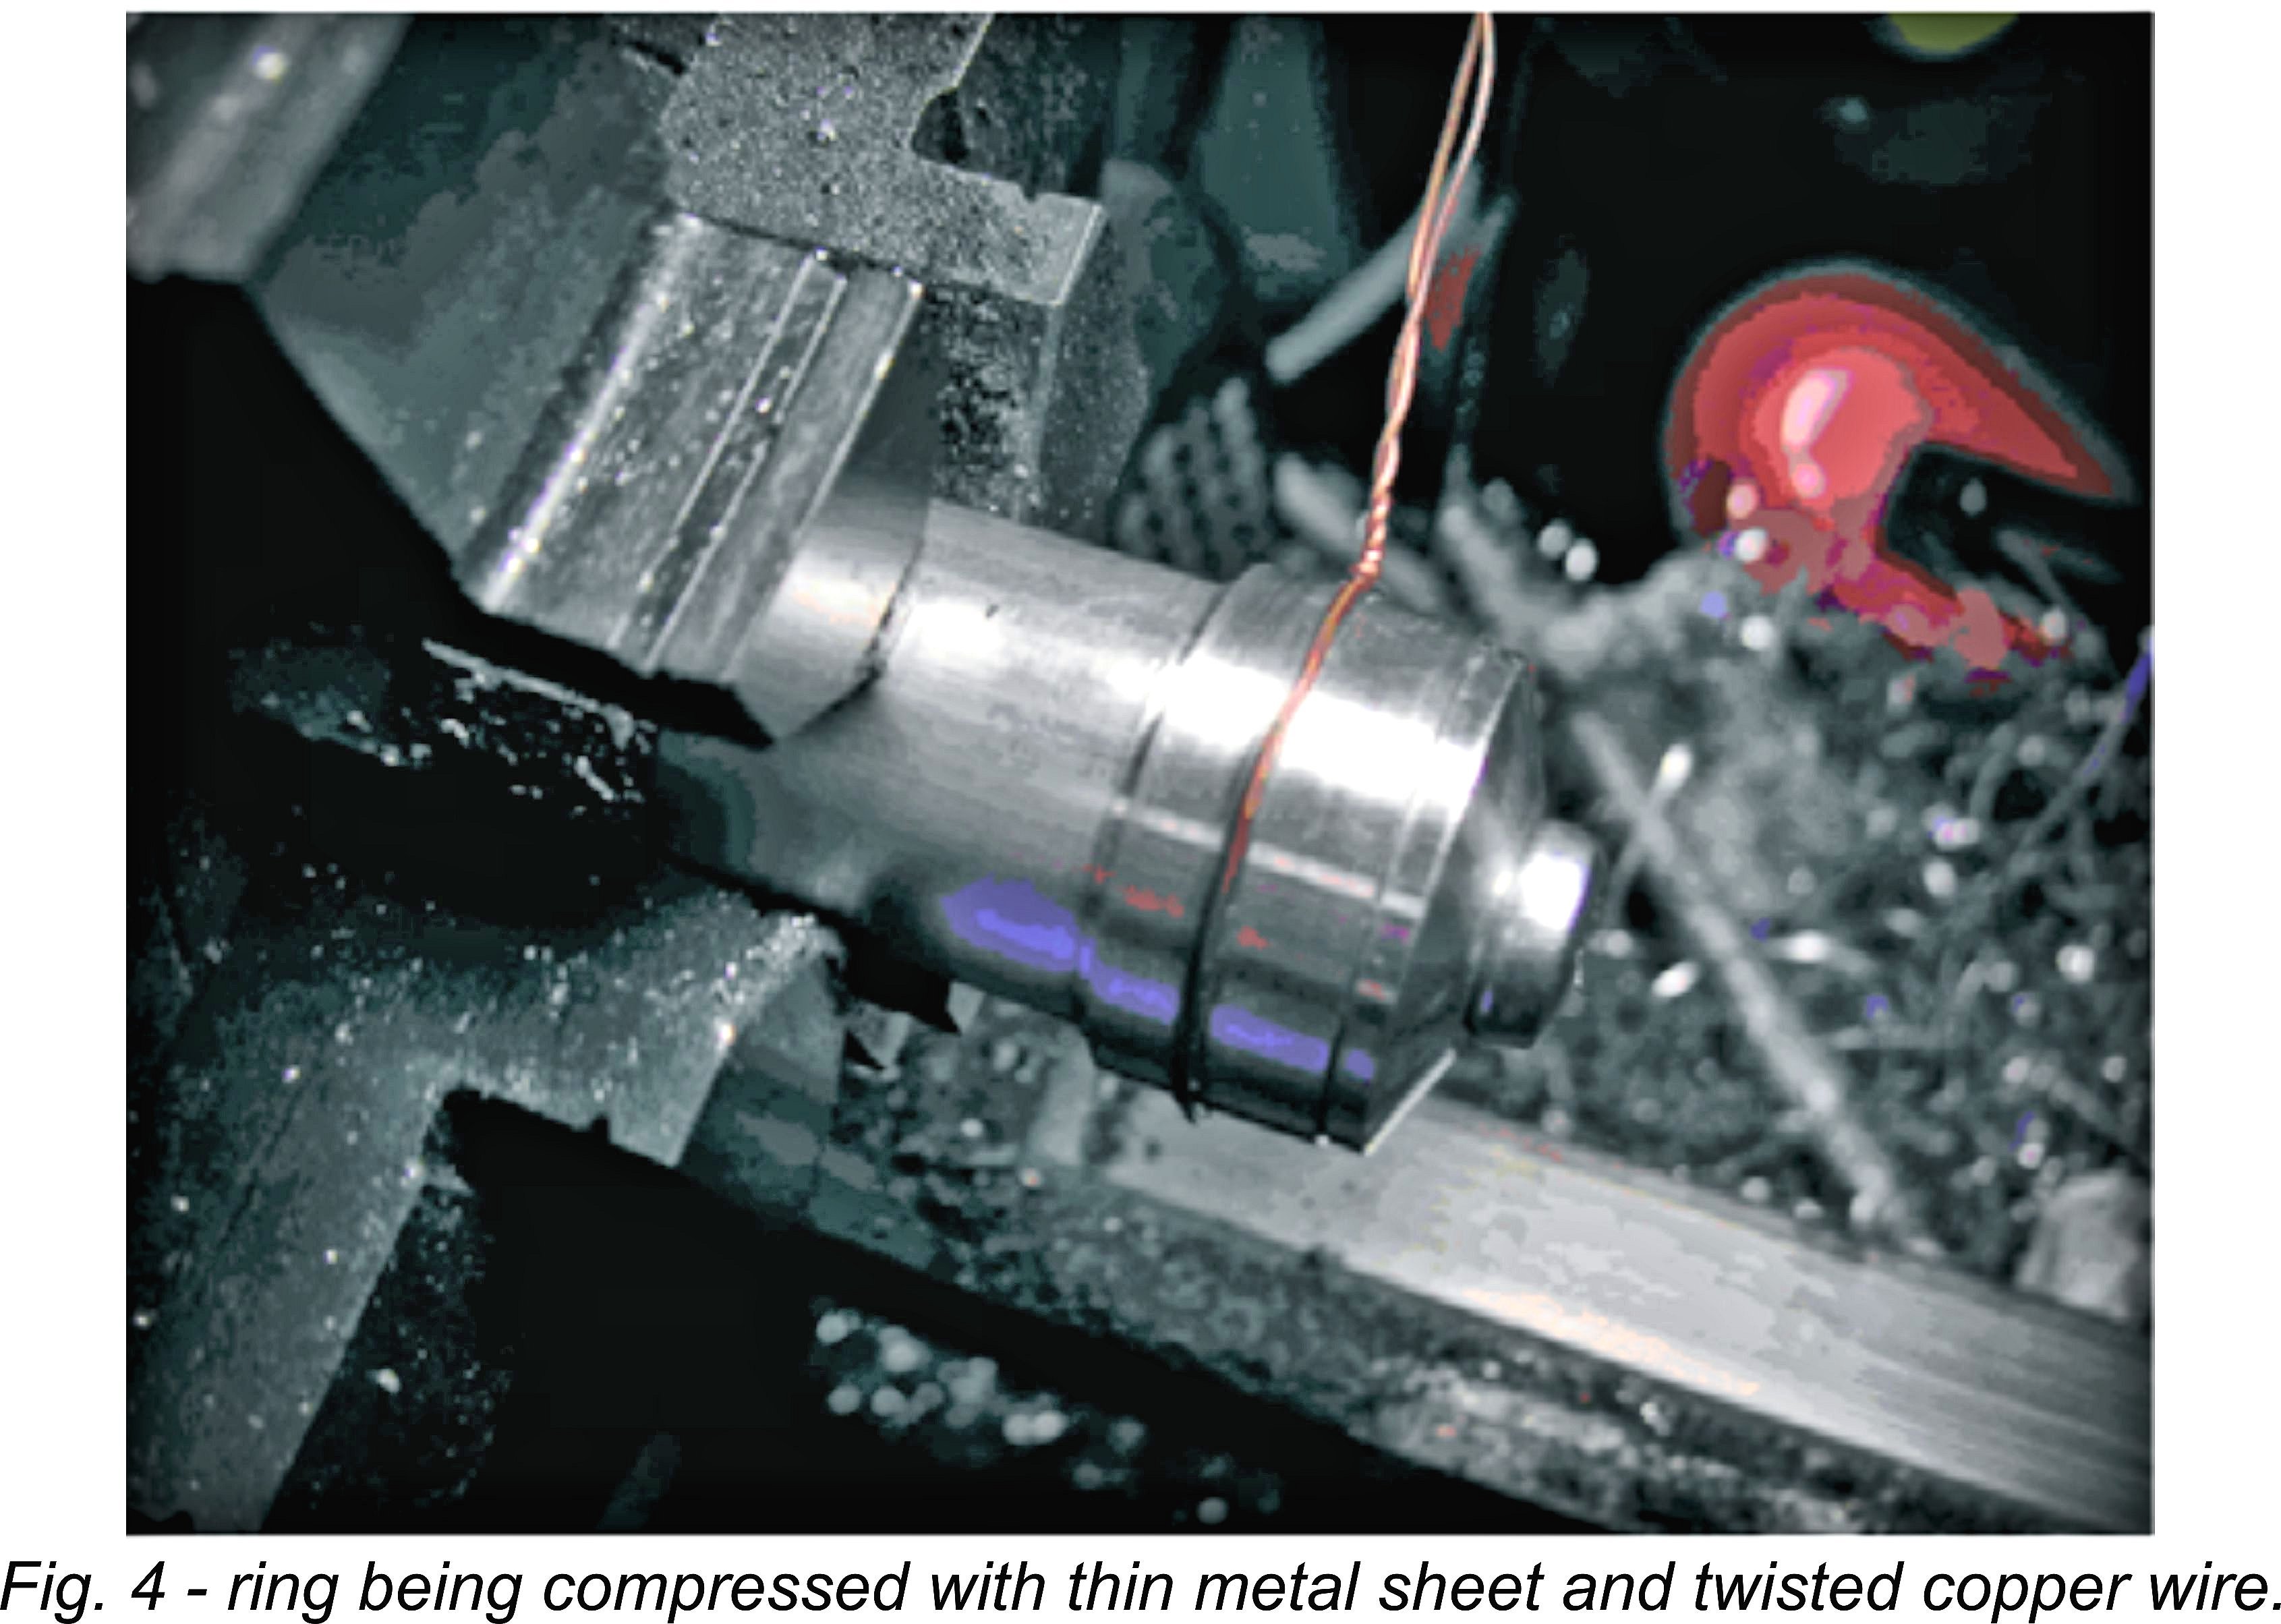
The tool is first used to make the ring gap. Squeeze the ring into the tool asymmetrically so that its one side is not sandwiched between the discs. I use a slitting saw in a Dremel drill that is mounted on the lathe top slide and can fed in accurately so that the cut is correctly Next, the ring is centered in the holding tool and compressed using a thin metal sheet which is tightened using twisted copper wire or similar (Figure 4). This is the central idea of the whole process: the ring is round when it is compressed in the cylinder, which means of course that it is not round when it is removed and hence un-compressed. For this reason, it must be turned to final size in the compressed state, as it will be when installed. The suggested technique compresses it uniformly all the way round, just as it needs to be in service. Do not be tempted to use your fingers to compress the ring into the tool, since this will give it a U-shape instead of the desired round shape. Now try to center the compressed ring in the tool as closely as possible, but remember that the inside diameter of a ring is not circular when it is compressed. Tighten the tool screw and check that the ring is secure and runs as true as possible when turning. The copper wire and sheet metal may now be removed. Now it's time to turn the outside diameter of the ring. Use a sharp tool, since doing so will create as good a surface finish as possible. The diameter should be turned to the same as the cylinder bore diameter or perhaps 0.01 mm (0.0004 in.) larger as a precaution – better slightly too large than too small! Now you can remove the almost-complete ring from the tool. After this is done, it is quite possible or even likely that the ring will not quite fit either in the piston groove or the cylinder bore. First, deal with the fit in the bore. Insert the ring into the lower part of the cylinder, which usually has a very slightly larger diameter than the upper cylinder. Push the ring upwards using the piston as a mandrel to keep the ring in the correct alignment within the bore. If it does not go all the way, put some fine sandpaper between the ring ends, compress the ring lightly and pull the sandpaper back and forth to grind away some metal from the ends. Push the ring into the cylinder again, and so on until it goes all the way with little resistance. Do not attempt to fit the ring to the piston yet – first test how well it enters the ring groove from the side. Its entire circumference must go in without any resistance; if you feel it getting stuck, you must grind it thinner. The ring must be able to move freely in the groove; if it sticks, it will not work! Remove about 0.01 mm (0.0004 in.) by lightly touching up the ring on a fine and straight oiled whetstone (using as uniform pressure as possible so that material is removed uniformly) and try again. Repeat until the ring fits along its entire circumference. All that remains is to polish the ring and fit it to the piston. Flex the ring as little as possible when fitting it - if you bend it or break it, you'll have to start all over again! Good luck! Kai Karma January 2008 |
| |
 This article appeared (in Swedish, naturally!) in the January 2008 issue of the Swedish control-line modelling magazine LINA. It was written by Kai Karma of Finland, who is a two-time F2B Nordic champion (in 2008 and 2010).
  Traditionally, piston rings are generally made of cast iron. I happened to have some soft leaded free-cutting steel on the shelf and decided to use it instead. This material is easy to turn and is very compatible with the hard chrome-plated cylinder wall of the ST .51. It is also less brittle than cast iron.
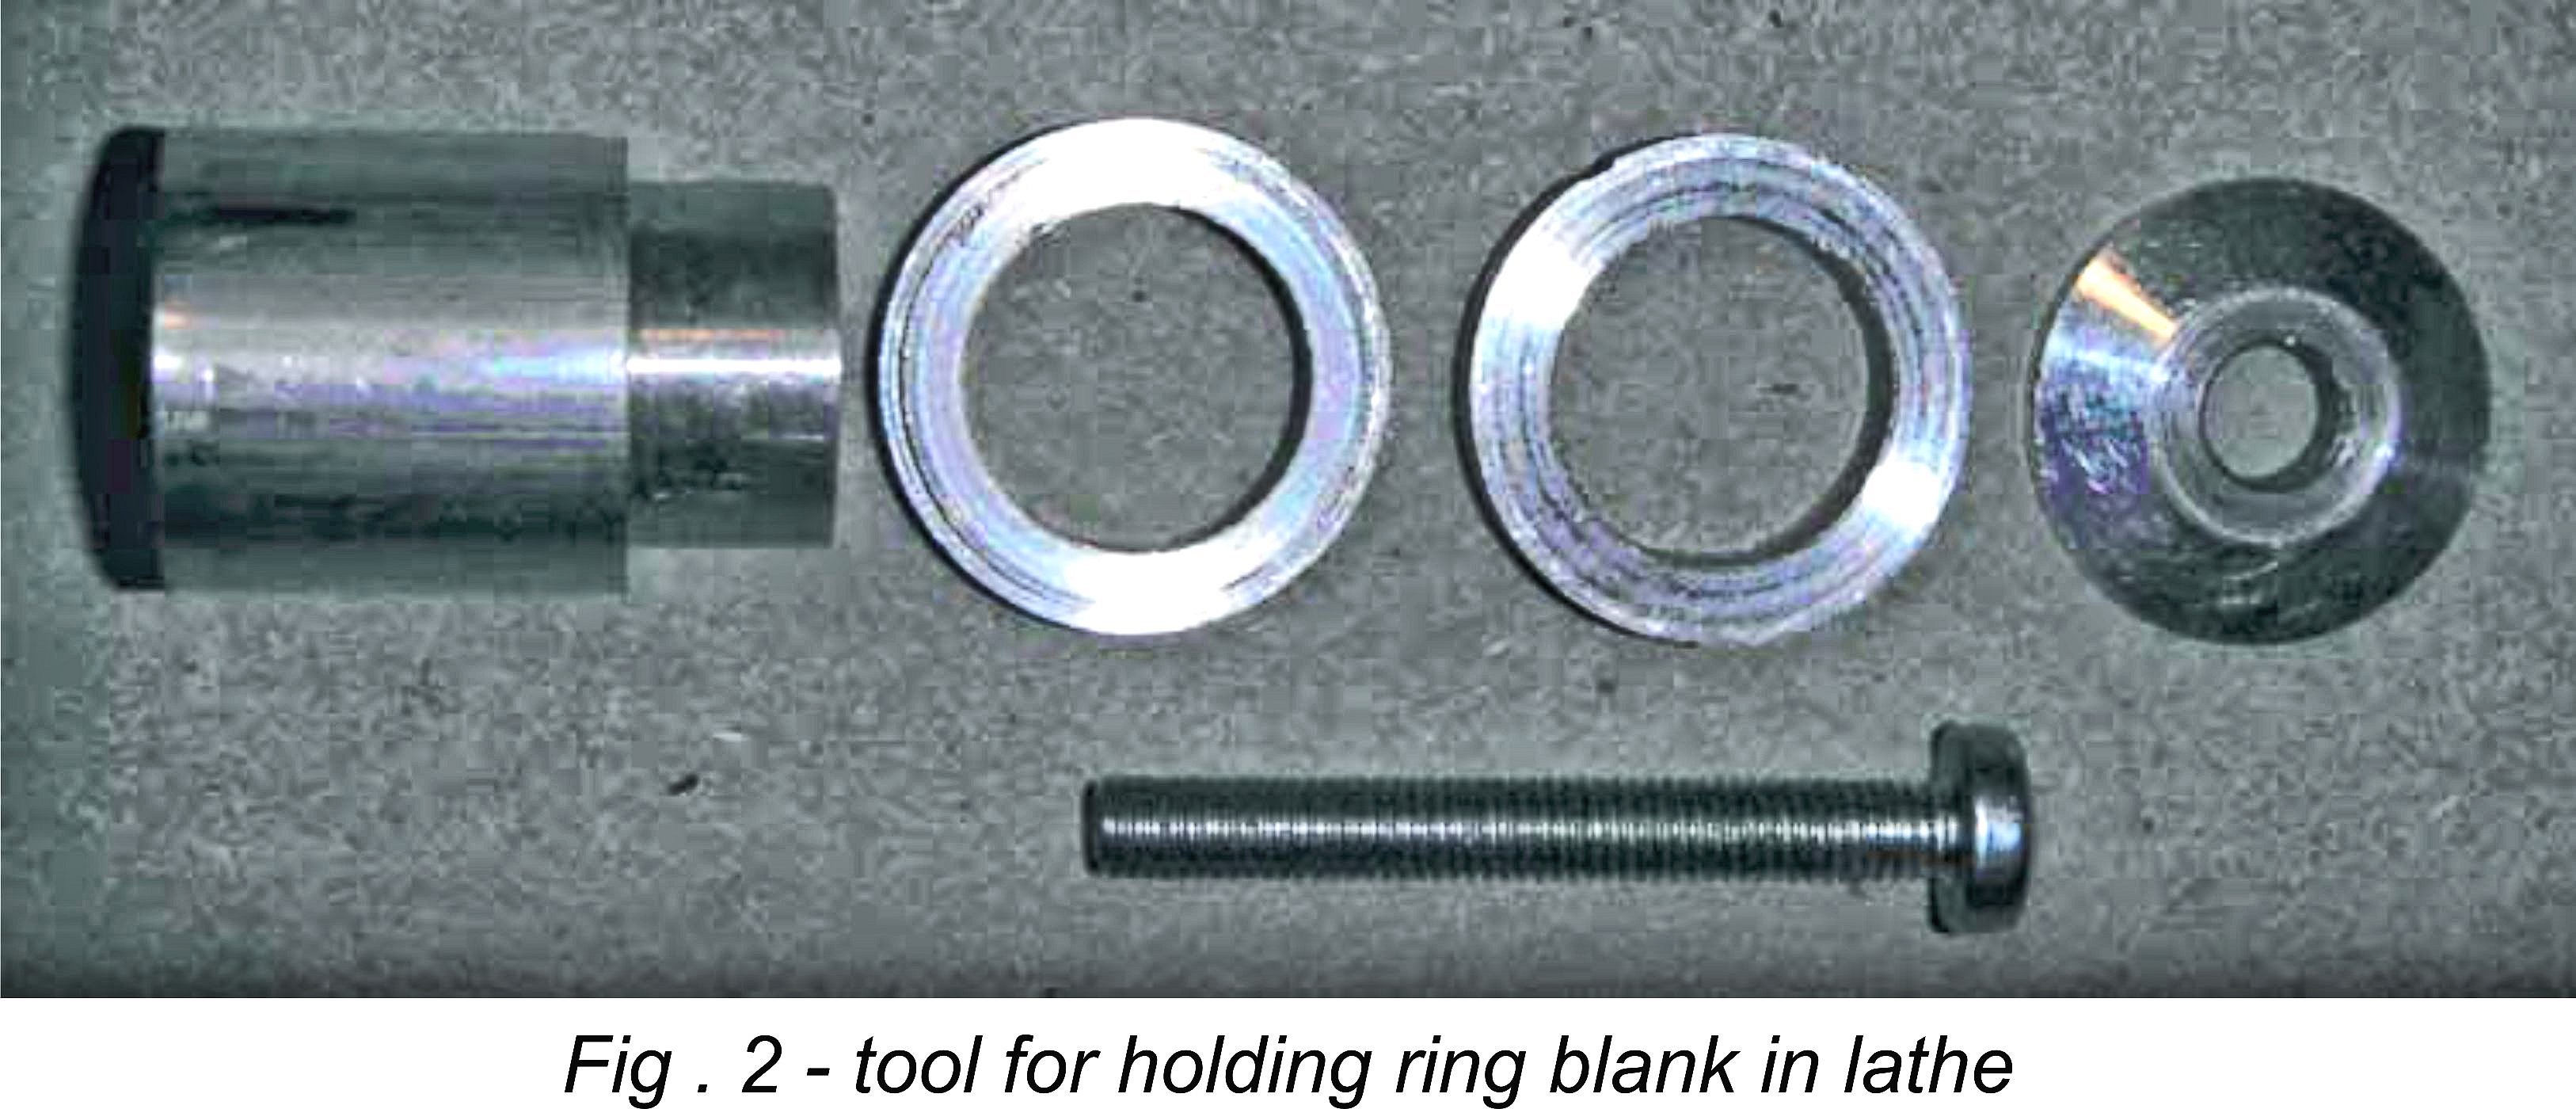
 In order to proceed from this point onwards, you need a special tool to hold the ring during further machining. Such a tool is easily turned from aluminium. It consists of a mandrel which can be secured in the lathe chuck and two discs that fit onto the smaller end of this part and can be pressed in place with a washer and screw (see Figure 2). These two discs should have an outside outer diameter of 0.2 - 0.3 mm (0.008 – 0.012 in.) less than that of the cylinder bore.
 aligned (see Figure 3). Make the uncompressed gap the same width as that of the original. If the ring has a groove for an anti-rotation pin (like the ST .51), it must be added now.
 Therefore, it is not critical to have exactly the same ring width all around – a perfectly round outside diameter when compressed is the important thing. Therefore, small errors in centering will not create a major problem.