
|
|
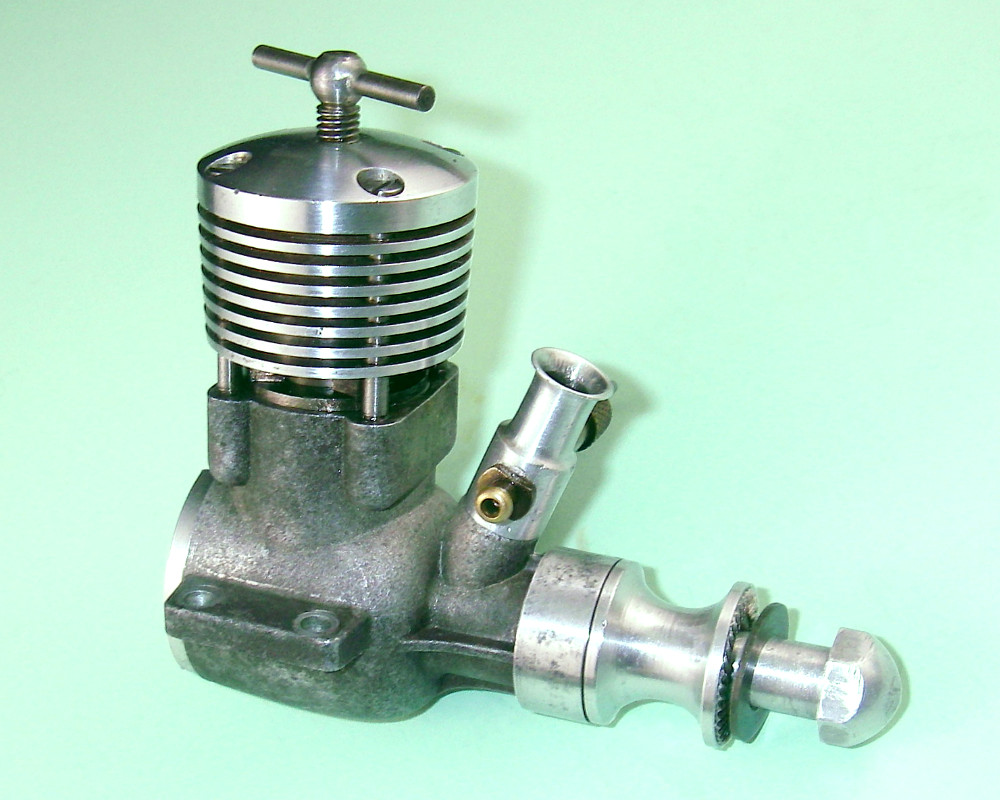
Breaking in a New Ferrous-Piston Diesel or Glow Engine
In more recent years, quite a few post-classic engines have abandoned the ferrous piston/cylinder set-up in favor of a non-ferrous ABC set-up or similar. The following comments do not apply to such engines. Information regarding the breaking-in of such units may be found in a separate article on this website. In fact, non-ferrous engines require a very different approach to breaking in, which lies beyond the scope of this article. The majority of this article will focus on ferrous model diesel engines, of which many examples remain available from various sources. There are still plenty of new model diesels on the “classic” pattern available from PAW, Parra and others as well as on the eBay circuit. Any model diesel benefits greatly from a proper break-in. So let's look at the how and why of break-ins, classic diesel style! Breaking-In a Ferrous Piston Model Diesel As noted earlier, the required approach to this challenge is rather different from that used for more up-to-date engines with their ABC or AAC piston-liner setups. In order to fully understand the break-in process which applies to a ferrous combination, it is necessary to appreciate some of the properties of the two materials involved, and how they work together. Before embarking on this exercise, I should recognize the fact that many readers will also encounter ferrous glow-plug engines which need a proper break-in. The metallurgical principles to be discussed below apply equally to both types, although the required break-in technique is a little different. Glow-plug users will a find a short section on the breaking-in of a ferrous glow-plug engine at the end of this article. Now, on to our discussion of the materials with which we are concerned! Firstly, cast iron and steel expand virtually identically when heated. This is why a close-fitted ferrous metal piston/liner set-up neither seizes nor loses all compression when the motor warms up. Naturally, we want to maintain and if possible enhance this close fit throughout the break-in process.
The wear on the harder part keeps the softer part charged with new hard particles, keeping the lapping process going. The parts are eventually honed by mutual action to a glass-like finish. Cast iron in its newly-manufactured state is very much softer than the hardened steel used in most diesel cylinders. Therefore, cast iron and hardened steel are an ideal combination from a wear standpoint, working together perfectly as described above. Meehanite cast iron, which is very close-grained and has a high graphite content, is the particular form most used for pistons in model diesels. Now if the above process were to continue, the steel cylinder would wear out relatively quickly and the piston fit would soon become unusably slack and "leaky". Fortunately for us, cast iron (particularly the Meehanite form) has two very convenient properties which have a great bearing on the break-in procedure. Firstly, the continued application of friction upon its working surface has the effect of making that surface become harder over time. This effect is called work-hardening. After some running hours, the surface of a Meehanite piston will test as hard on a test rig. This both increases its wear resistance and reduces its tendency to trap more particles of the cylinder material, thereby continuing to hone or lap the bore larger. This greatly slows the wear rate of the cylinder material. The other very fortuitous property of cast iron is that it tends to "grow" dimensionally over the first several dozen heat cycles to which it is exposed. This allows a cast iron piston to "grow" to accommodate the microscopically larger cylinder which results from the initial lapping process. Convenient, or what?!? An extreme application of this characteristic is the use of "cherry bombing" (heating to red heat) to grow a worn cast iron piston to the point at which it can be re-lapped into its cylinder. The key point to retain from all this is that the cylinders of model diesels are generally of hardened steel which remains hard throughout the engine's life. The piston, on the other hand, starts out soft and becomes hard over time. During the hardening process, it laps the cylinder to a glassy finish and grows a little to maintain the correct clearances as the cylinder wears, but then stabilizes both in terms of hardness and dimensions. At this point, we have two hard materials at an optimal fit and finish working together - perfect conditions for long life and good performance! This is what our break-in tries to achieve. But it takes time, since we need both the work-hardening time and the heat cycles to achieve stability. And time, alas, is what all too many model diesel owners appear unwilling to give it, greatly to their own disadvantage. In summary, what we want to accomplish during break-in is to use the piston as a built-in lap to optimize the fit and finish of the steel cylinder (but not to wear it unduly). This of course expands the cylinder bore microscopically, so we want the piston to expand a little to take up the slack caused by the lapping of the cylinder. We also want to end up with a nice hard wear-resistant piston, and we want the work-hardening to be completed at the point where the piston has stabilized dimensionally and the cylinder is correctly fitted and finished. Tricky, huh?? Not at all, as it happens, due to the fortunate combination of properties of the two materials involved! (1) Use a prop that keeps the revs well below what would be reached in the air, at least initially. A 9x6 prop is good for a PAW .15BR, a CS Oliver Tiger or any other similar motor, and the good flywheel effect is an aid in getting a tight new motor running. You can switch to a 9x4 or an 8x6 after 4 or 5 runs. Use a high-quality fuel with at least 25% oil, most or all of it castor. Add extra castor oil if you need to. At this point I may as well come out and state my opinion (and that of many other regular long-time diesel users) that, manufacturers’ claims to the contrary, there’s no substitute for castor oil as a lubricant for model diesels. The bearing pressures and operating stresses are substantially higher than those in a glow-plug motor, and synthetic oils simply don’t cut it when diluted with diesel fuel ingredients. Do not be tempted to use significant percentages of any other lubricant, and never use less than 25% castor at any time except when using a well broken-in motor under circumstances in which performance or fuel economy rather than longevity are the primary objectives. (2) Start the engine and run it slightly rich and a touch under-compressed (smoky and missing slightly) for 4 minutes or so. This allows the piston an opportunity to lap the cylinder surface effectively with plenty of lubrication, minimal wear and not too much heat. We don't want to lap too much off the cylinder or wear the piston down!! It also allows the rod and shaft bearings to bed themselves in under easy conditions. Finally, it initiates the work-hardening of the piston surface. (3) Keeping the engine running, adjust the compression and needle valve for fastest speed (leaned right out). The purpose of this is to get the piston up to full running temperature to help it to grow to its stable dimension as discussed above. Run it like this for one minute maximum, then stop the engine by disconnecting the fuel line or closing the needle (NOT by choking or backing the compression off - this cools the piston prematurely!!). (4) Allow the engine to air-cool slowly but completely before restarting. Have patience (a commodity sadly lacking among many of today’s modellers!)!! This cooling stage is essential, since it allows the piston to go through a complete full-range cold-hot-cold cycle (or heat cycle) and begin the process of thermal stabilization discussed earlier. Each heat cycle causes the piston to grow a little, at least until thermal stabilization is achieved after several dozen runs.
(6) The last two or three runs should be made with an 8x4 prop to increase the leaned-out speed a little to something approaching flight speeds. At this point, the motor can be flown using an 8x6 prop. For the first 4 or 5 flights, keep the needle slightly rich and allow complete cooling between flights so that the piston continues to experience complete heat cycles. At this point, the motor is to all intents and purposes broken in, and even smaller props could be used if desired. The prop sizes mentioned in the above summary are those generally applicable to a 2.5 cc (0.15 cuin.) engine. Diesels of other displacements will require different prop sizes, but the principles remain unchanged. I have seen many other approaches to breaking-in, including a number of "instant" break-in procedures. All of these in my direct experience have resulted in excessive premature piston wear during the break-in process, and motors broken in "on the fly" in this way neither perform nor last anywhere near as well as those which receive the treatment recommended above. I know, because I’ve had to rebore the resulting prematurely clapped-out engines for a number of my friends who did not take my advice! I have now stopped doing this ……listen to my advice, or suffer the consequences! I hope it will be clear from the above explanation that time, and time alone, can achieve a proper break-in with a ferrous piston/cylinder combination due to the unique properties of these two metals in combination. You've paid for it - you might as well get the full performance potential for which you've paid! My tuned 1963 FROG 349 BB (which I’ve owned from new and used for over half-a-century now) is still going strong on the original bore, runs like smoke and feels near-new with well over 100 hours of hard running on it - the original piston fit is still almost totally leak-free. It's all down to the break-in and the use of the correct fuel! Before moving on briefly to glow-plug motors, I should point out the one exception to the above approach. A number of early pioneering and classic model diesels used both hardened steel liners and hardened steel pistons. The diesels produced by Reeves and J.B. were examples, and there were others. The break-in requirements for the rod bearings and main bearing are unaffected by this choice of materials. The difference centres upon the piston/cylinder fit. A steel piston does not grow with heat cycles in the same manner as a cast iron item. Moreover, piston/cylinder wear over a normal break-in period will be minimal. This places the responsibility for creating a perfect piston/cylinder fit squarely with the manufacturer - if the fit is too tight when first assembled, no amount of running-in will fix it. Prospective buyers of new or near-new examples of such engines will do well to satisfy themselves that the piston/cylinder fit is within useable limits as received. If this checks out, the purpose of the break-in will be essentially confined to bedding in the rod and crankshaft bearings. The repeated heat cycles described above with respect to a cast iron piston will have essentially no effect. When the bearings are well settled, the engine is ready to run. Ferrous Piston Glow-Plug Break-in
Well, exactly the same metallurgical considerations apply to both glow-plug engines and diesels using such a combination. You still have to use the piston as a lap to optimize its fit in the bore; you still have to give it an ample opportunity to work-harden; and you still have to subject it to the same series of full-range heat cycles in order to stabilize it dimensionally. The correct approach in this case is to use a slightly lighter load than the one that you expect to use for flying purposes. This is because unlike a diesel, you can't alter the ignition timing of a glow-plug engine (except by running rich; by varying the compression ratio between runs using shims; or by changing the plug's heat range). The key point is that the ignition timing of a glow-plug engine is set by its designer to be optimized for two-stroke operation at or near its intended peaking speed. It follows that such an engine will tend to pre-ignite at lower speeds no matter what you do, so it's best to avoid such speeds. What you want is a prop that will allow the engine to approach or reach it's in-flight operating speed on the bench. This means a smaller prop than the intended flight component. The use of such a prop has the added benefit of reducing the loadings on the engine's sliding bottom end bearings (con-rod, crankpin, wrist pin, main journal, etc.) during the break-in. It's also advisable to use a more oily fuel than usual during the break-in process. I use a fuel containing no less than 25% de-gummed castor oil for break-in purposes. Castor oil provides excellent insurance against the effects of local hot-spots which may develop in a new engine prior to the completion of the break-in. It also provides excellent insurance against the effects of a lean run once the engine is in service. For a full discussion of model engine lubricants, see my separate article on this topic. A final point worthy of comment – don’t use a brand-new glow-plug during the break-in process. The reason is that very fine metal particles will inevitably be polished off the various moving parts during this process. These microscopic bits of metal will tend to stick to the platinum-irridium glowplug coil, effectively contaminating it and making it "colder". If you use a brand new plug for the initial runs, you could significantly shorten its life, thus wasting good money. Far better to use an old dedicated break-in plug for the first few runs, then fit a new plug once the engine has got past the break-in stage. Having fitted an appropriately-sized prop and provided yourself with some suitable fuel, the correct technique is to run the engine in four-stroke mode for around 5 minutes at a rich needle setting, keeping the mixture just shy of causing the engine to break into two-stroke mode. In this mode, the plug will run cooler, retarding the ignition somewhat and thus reducing loads upon the engine's bottom end components. The effect on bearing stresses is the same as reducing the compression setting of a diesel. At the end of this period, the engine should be leaned out briefly into full two-stroke mode in order to get the piston up to normal operating temperature. Be careful not to go too lean at this stage, and don't continue this for long! The engine should then be stopped by cutting off the supply of fuel and allowed to cool completely before the process is repeated. This complete cooling is critical, since only full-range heat cycles can stabilize the piston dimensionally. After about 40 minutes of this (eight heat cycles minimum), try leaning the engine out to its best speed on the break-in prop, being careful not to go too lean. If it will hold full speed for 60 seconds or more without any sign of sagging, the break-in is complete. Otherwise, stop the engine, allow it to cool completely once more and then repeat the 5 minute rich-lean cycle a few more times. Then try leaned-out operation again. Break it in right, keep it clean and feed it the right fuel, and you'll have an engine that will stick with you for the long haul!! ________________________________ Article © Adrian C. Duncan, first published August 2014
|
 Fair enough, I hear a few of you saying - but what if the engine isn't a diesel? Many glow-plug engines from the "classic" era, such as those produced by Fox, Enya, Fuji and others, use similar ferrous piston/cylinder technology. How does one approach the break-in of one of those units?
 | |